
What is Muscle Testing?
Muscle testing is a simple, non-invasive way to tap into the body’s inner intelligence. It helps uncover what may be causing physical or emotional discomfort, things that often lie beneath our conscious awareness.
The idea behind muscle testing is that your body knows what it needs and what’s out of balance. By gently testing a muscle’s response, we can ask the subconscious mind direct yes-or-no questions about your physical, mental, and emotional well-being.
This method, also known as kinesiology, actually has scientific roots. It was first developed in the early 1900s to measure muscle strength in patients with polio. Over time, practitioners discovered it could do far more—revealing subtle energetic imbalances that affect how we feel and function. Today, more than a million practitioners around the world use some form of muscle testing in their healing work.
Here’s how it works: when a question is asked, the subconscious mind responds through the body. A strong muscle response generally means 'yes,' while a weaker one means 'no.' This allows us to identify hidden stressors, trapped emotions, and energetic blocks that may be affecting your health or happiness.
In my practice, I use muscle testing as part of Belief Code, Body Code, and Emotion Code. These methods use the body’s own feedback to locate imbalances, discover when they first occurred, and understand the circumstances surrounding them—so they can be released and brought back into balance.
There are several different ways to perform muscle testing. Below, you’ll find some of the most reliable methods, with instructions on how to use each technique, including the ones I use every day with my clients.

The Sway Technique
The Sway Technique is a simple, self-administered method to detect subtle yes/no responses through the body’s natural movements.
Stand comfortably with your feet about shoulder-width apart, without leaning against any support. Fold your arms across your chest, resting your palms on your upper torso. Close your eyes to minimize distractions. Focus on a yes/no question or hold a thought in mind. Your body will respond with a subtle sway: typically forward for 'yes' and backward for 'no.'
Stand freely so your body can move naturally, and avoid touching walls, chairs, or other objects for support. Close your eyes to improve sensitivity and reduce external influences.
Start with simple, verifiable questions such as 'Is my name ___?' to calibrate your body’s forward/backward responses.
Observe the sway gently; even small movements are significant. A yes answer should have you swaying forward, and a no answer should have you gently sway backward.
The Sway Test is particularly useful when you are testing yourself and don’t have a partner available. It provides an immediate, physical way to access intuitive or subconscious responses.
The Elbow Technique
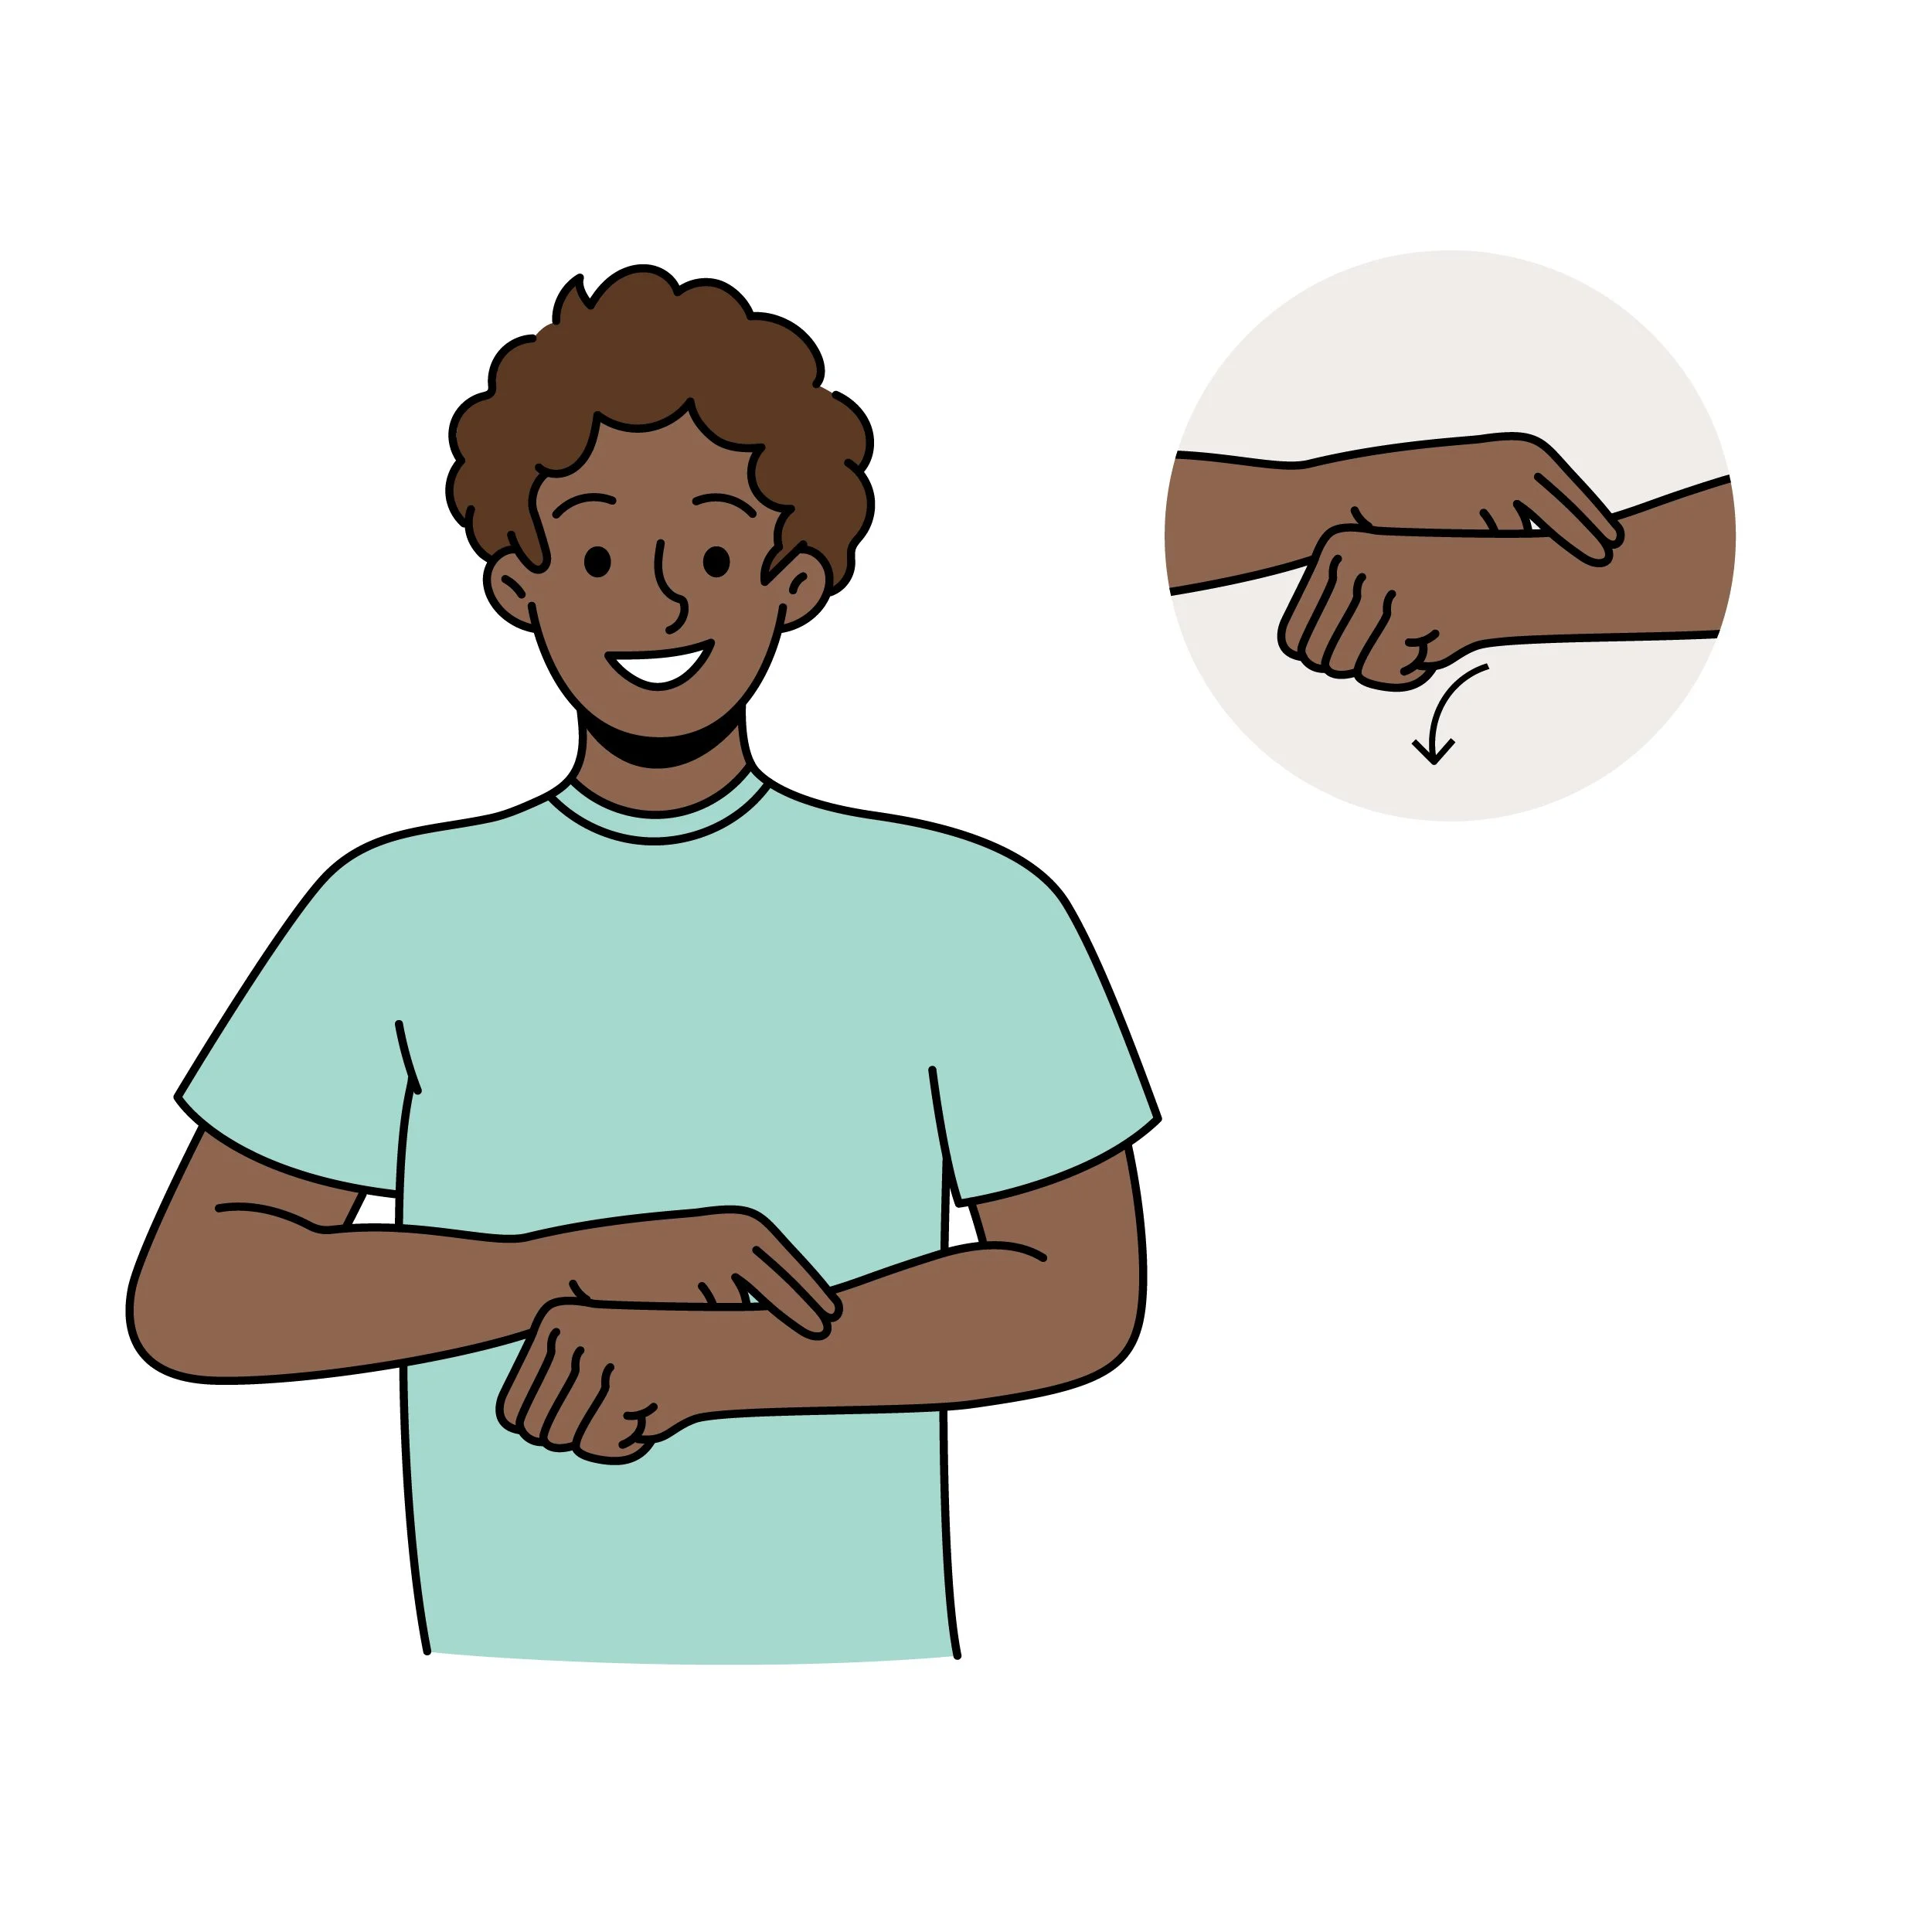
This is the test that I use daily in my remote sessions with clients. This test targets the biceps muscle, a strong and enduring muscle, making it ideal for repeated testing throughout the day without tiring.
Because the biceps are so powerful, it’s important to use only a minimal amount of resistance and downward pressure, just enough to detect subtle changes without straining your fingers. A good rule of thumb is to use only the strength required to hold your forearm horizontal to the floor, preventing it from dropping.
Bring one elbow to your side, bracing your upper arm against your body. Bend your arm at a 90-degree angle so your forearm is parallel to the floor. The hand can face palm up or palm down.
Place two fingers from your opposite hand on the end of your forearm before your wrist. Say 'yes' and apply gentle downward pressure; the forearm should remain strong. Say 'no' and press again; the forearm should weaken slightly.
The goal is sensitivity: notice subtle changes in strength rather than using force.
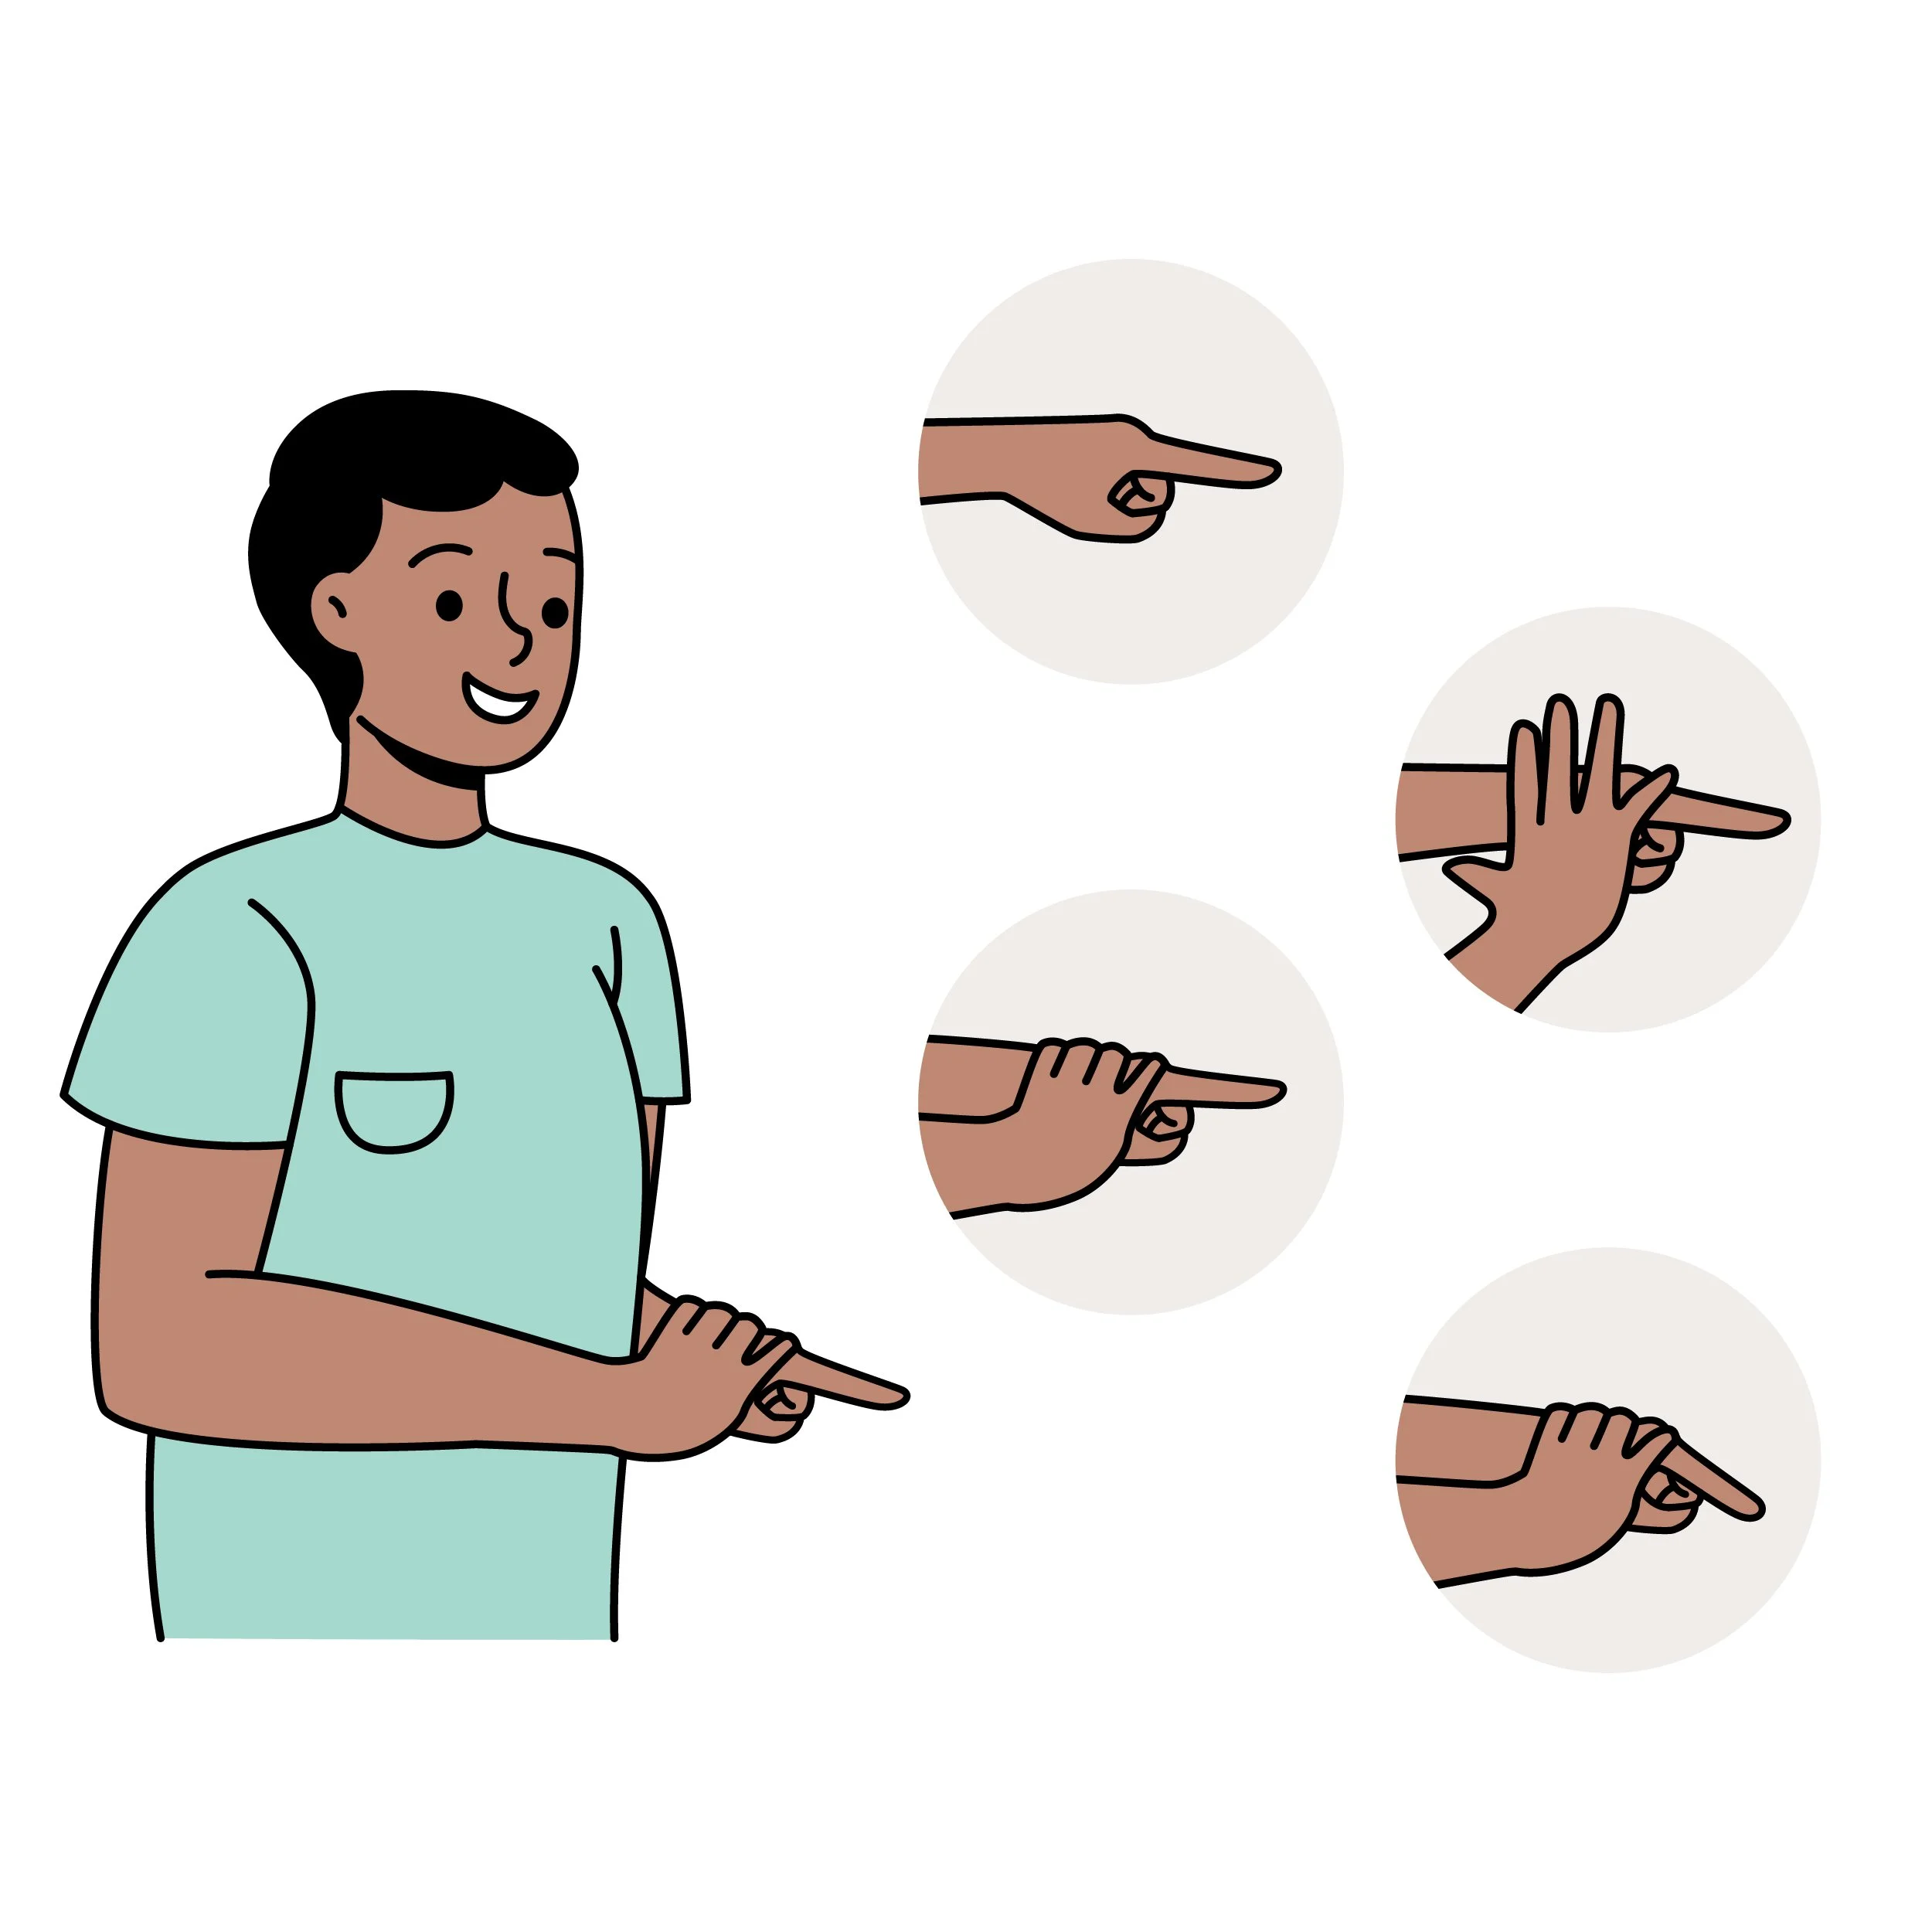
Single Hand Technique
This is a convenient, one-handed technique, and my personal favorite.
Use two adjacent fingers on the same hand. Most people find the forefinger and middle finger work best, though the middle and ring fingers can also be used.
One finger serves as the resistance finger, while the other – the pressure finger – applies gentle downward pressure.
Experiment to find the most comfortable position. The pressure finger can rest fully on top of the resistance finger or be slightly arched, allowing the fingertip to rest on the last knuckle. Whichever position feels natural will usually produce the best results.
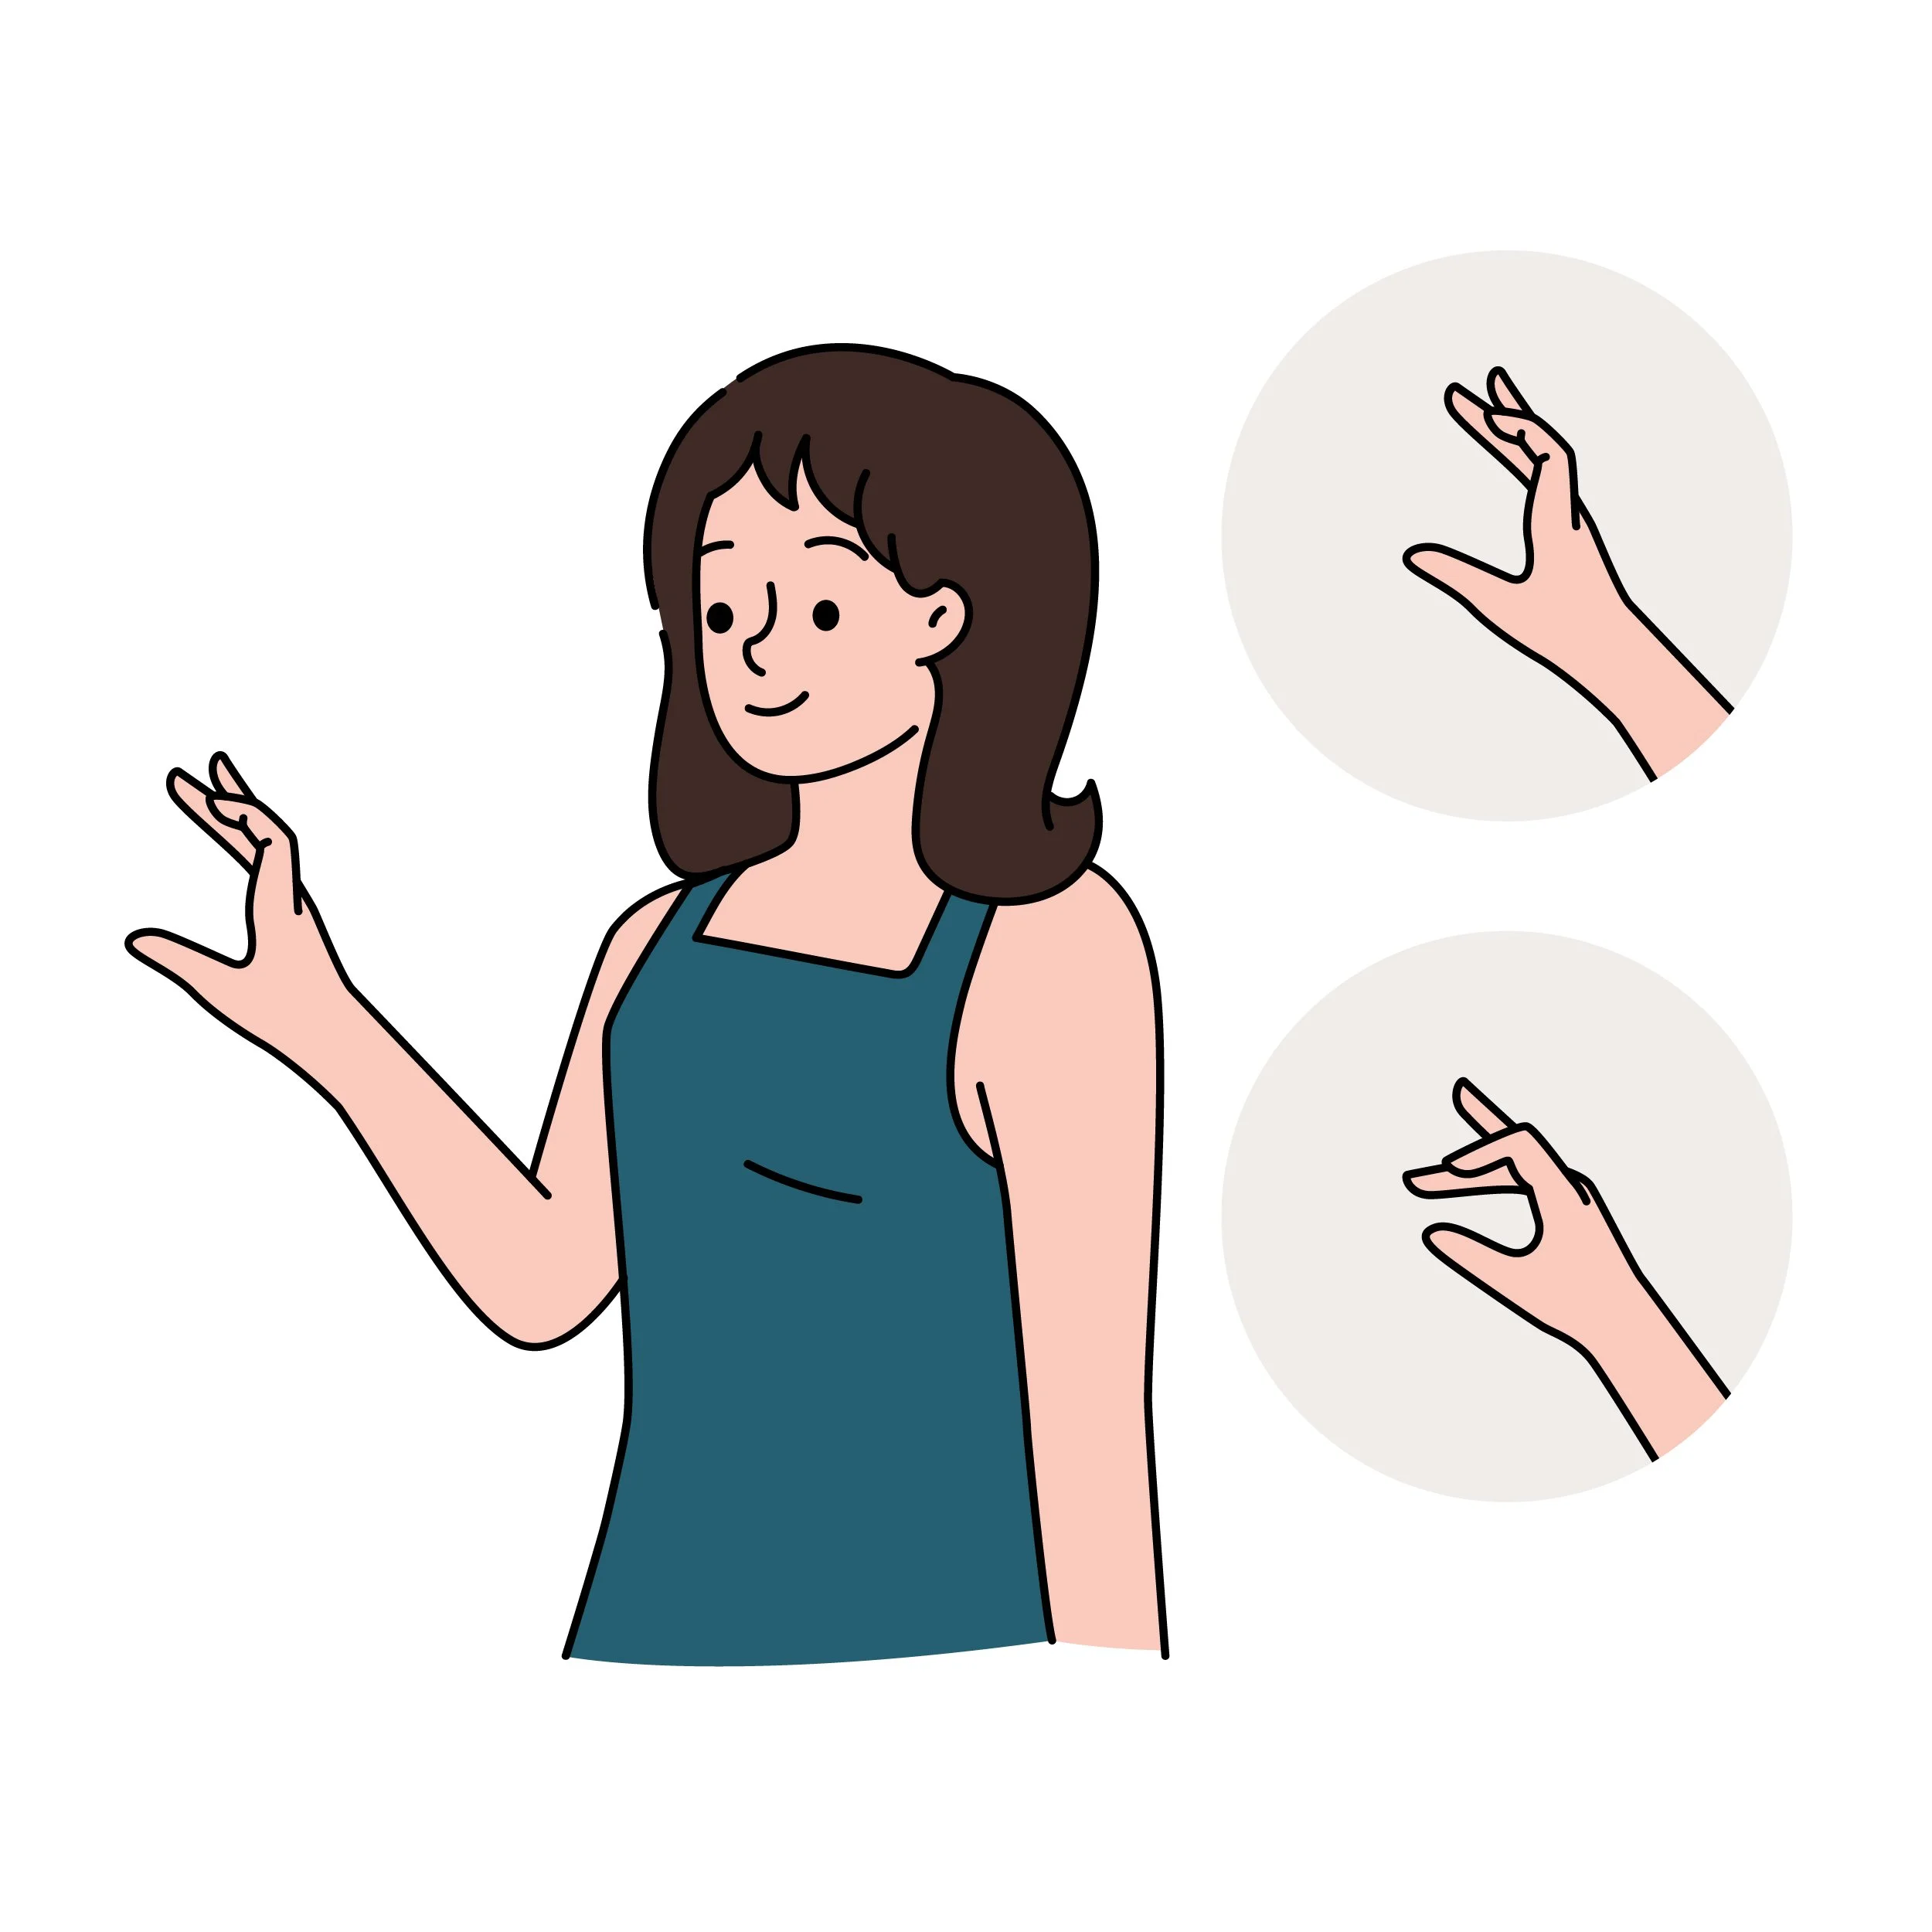
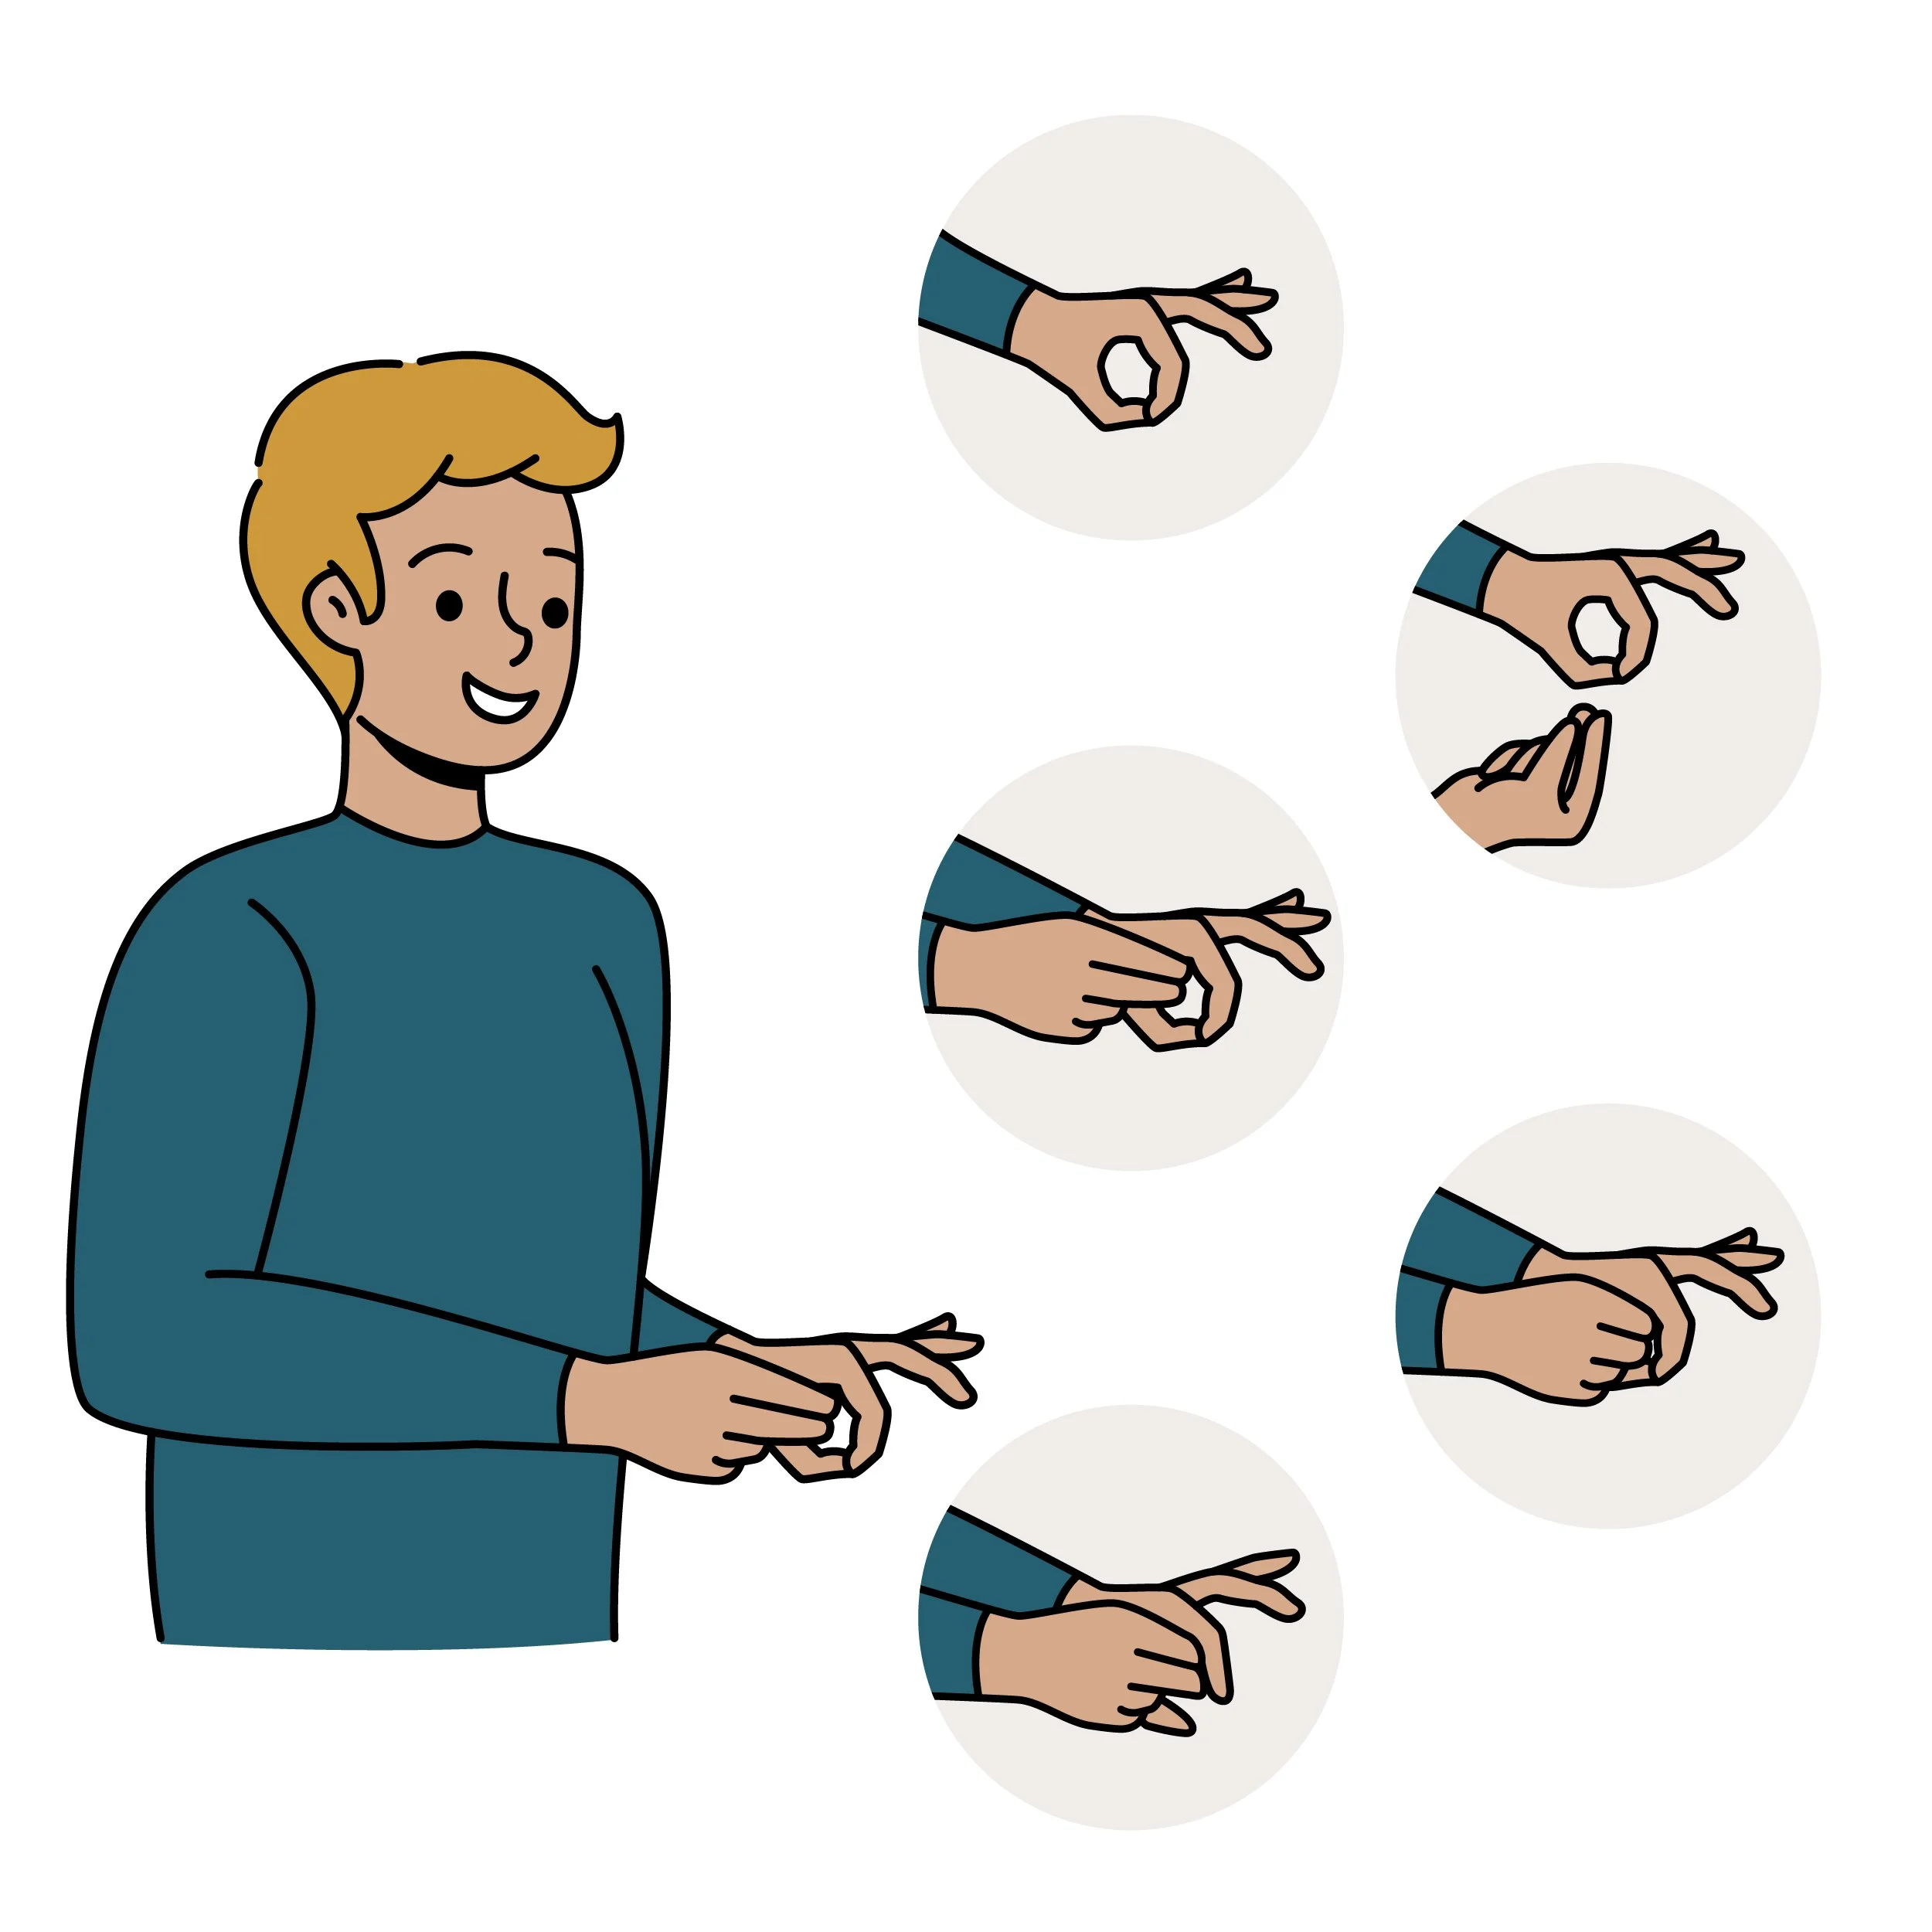
The Flick Technique
The Flick Test is a one-handed technique that utilizes your thumb and little finger, the weakest fingers on the hand, in a motion similar to flicking something off your fingertip.
Place the tip of your little finger against your thumb’s fingerprint to form a small loop.
Say 'yes' and gently try to flick the little finger; the loop should remain intact. Say 'no' and try again; the little finger should lift or move away slightly, reflecting the negative or incongruent statement.
This method is subtle, quick, and effective.
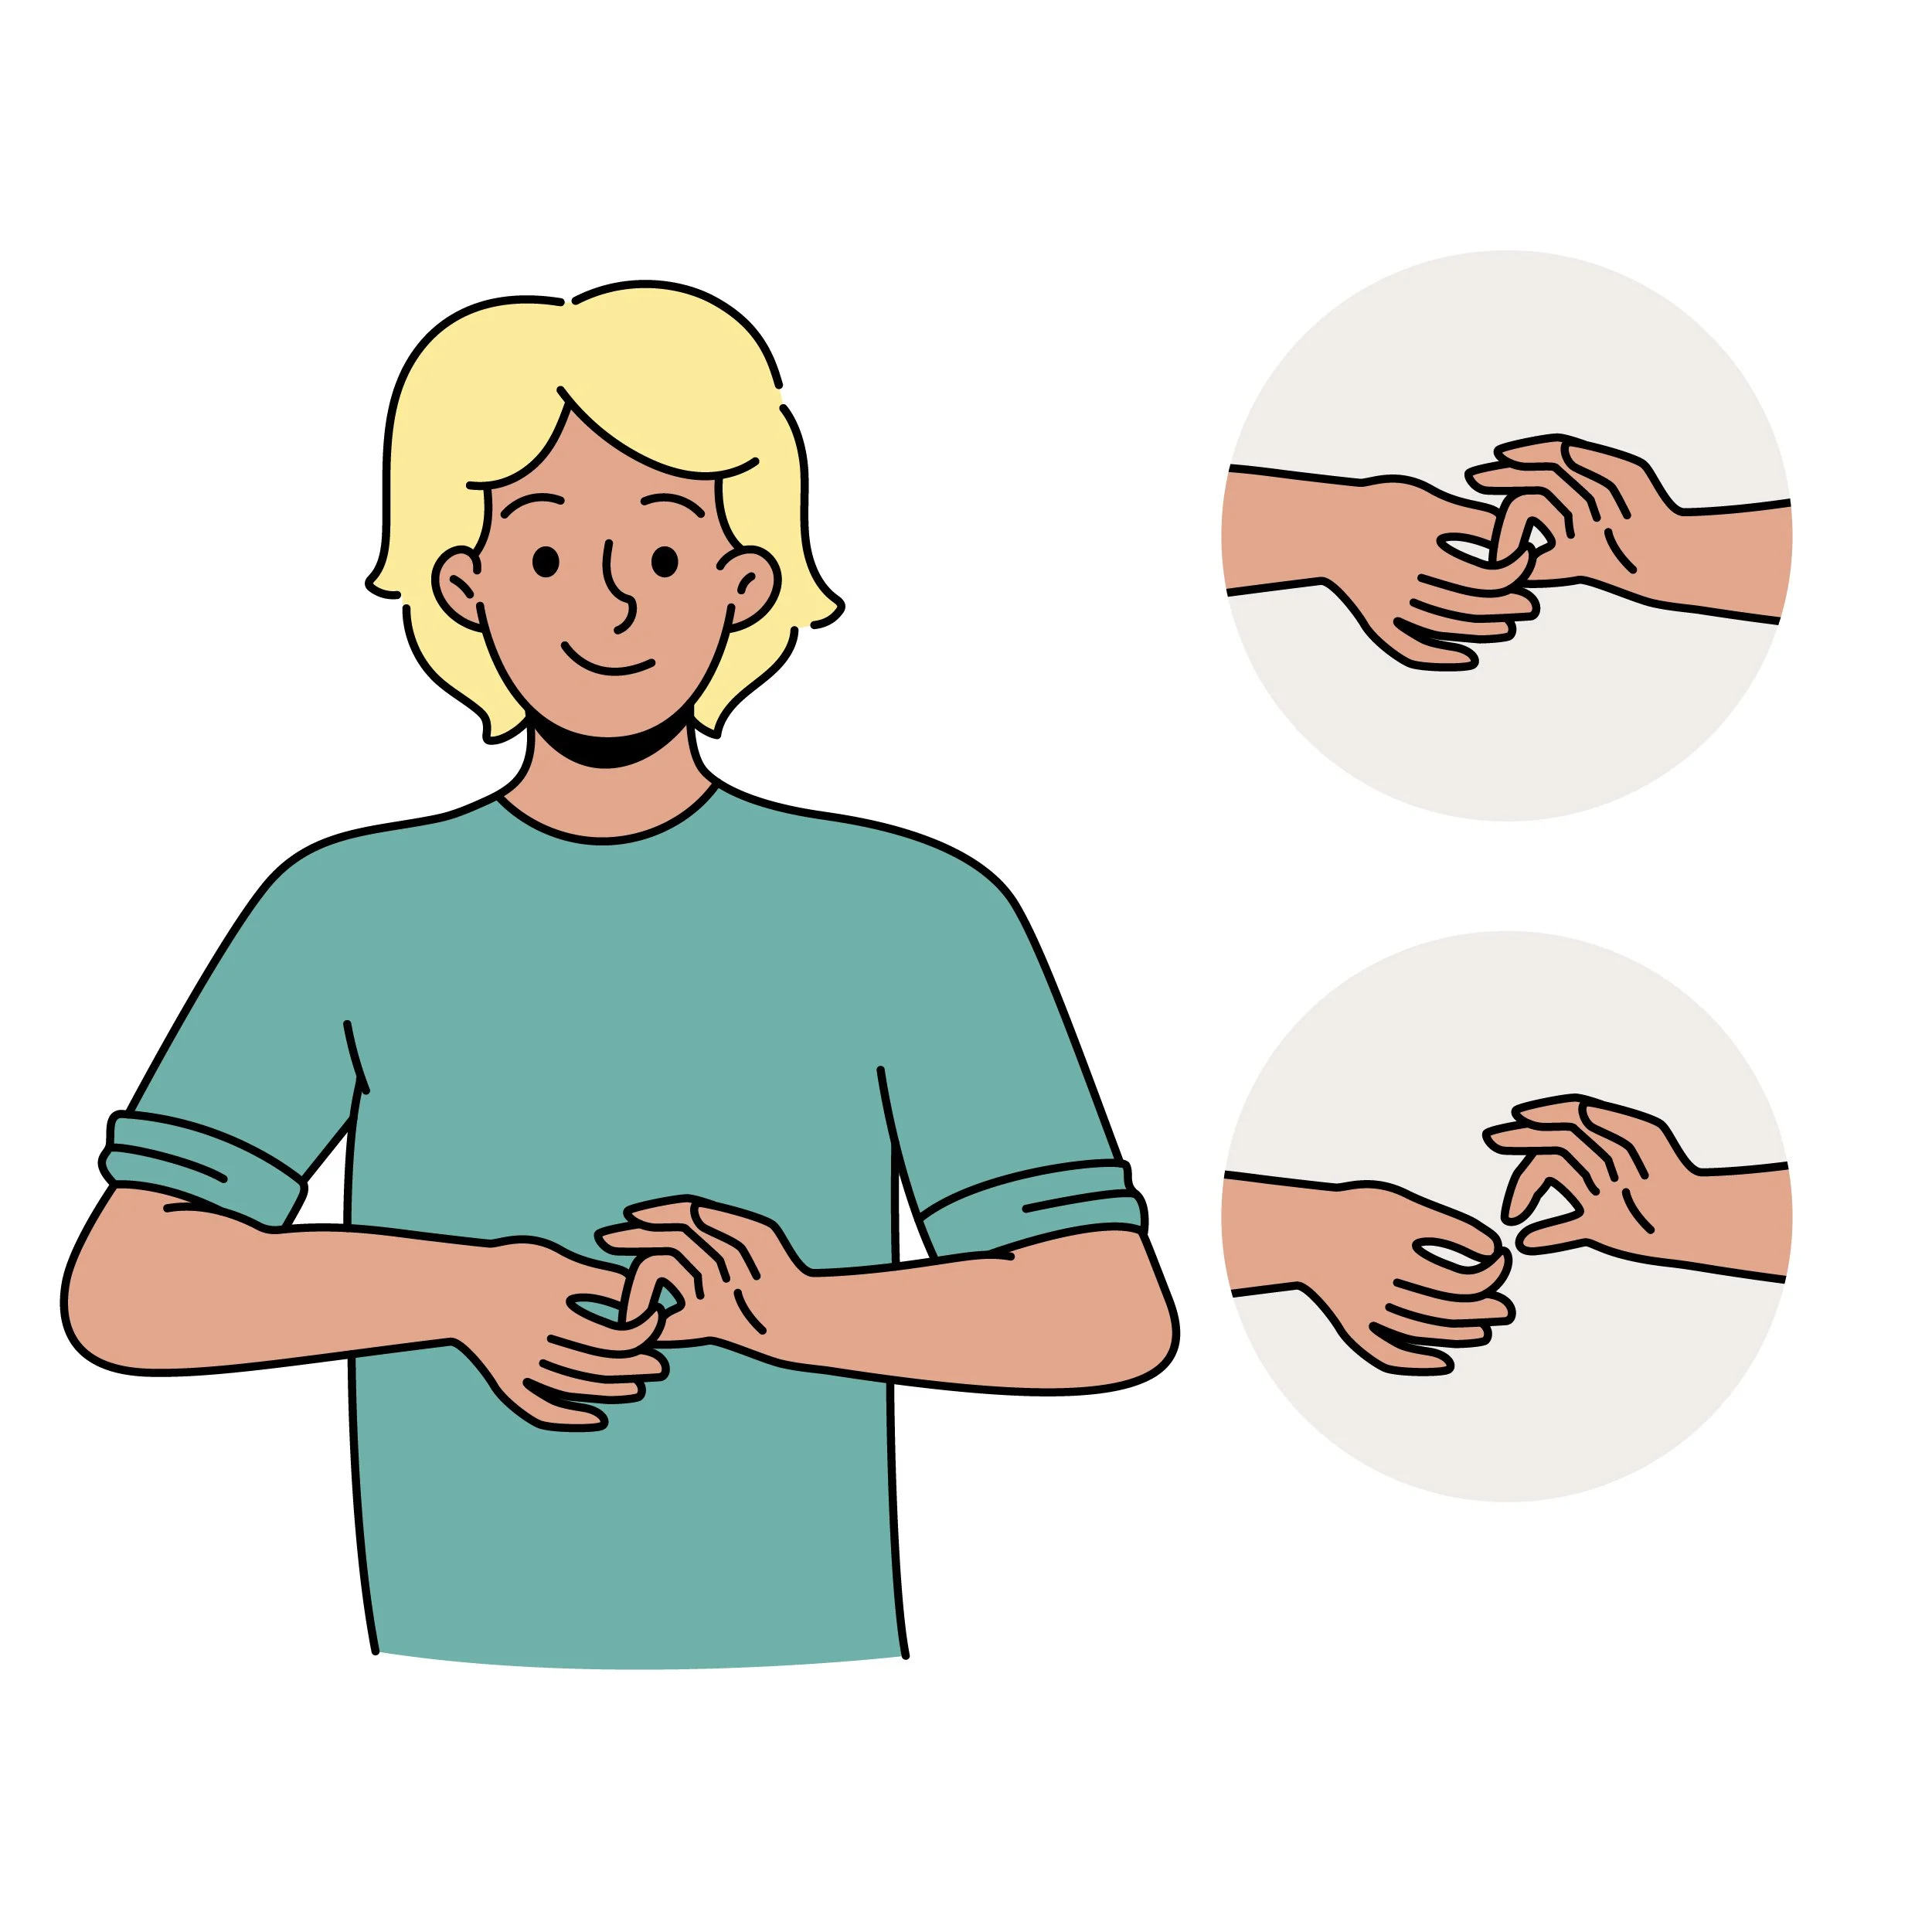
Two Hand Technique
This is a variation of the Single Hand Technique using both hands.
If you are right-handed, make a loose fist with your left hand and extend your left forefinger. This becomes the resistance finger.
Next, place your right hand over the fist and grip it firmly. Rest the last joint of your right pinky finger on the extended left forefinger; this is the pressure finger.
If you are left-handed or this position feels awkward, simply reverse your hands.
Once your fingers are positioned correctly, follow the same pattern outlined in the Hand Solo explanation. One finger serves as the resistance finger, while the other, the pressure finger, applies gentle downward pressure.
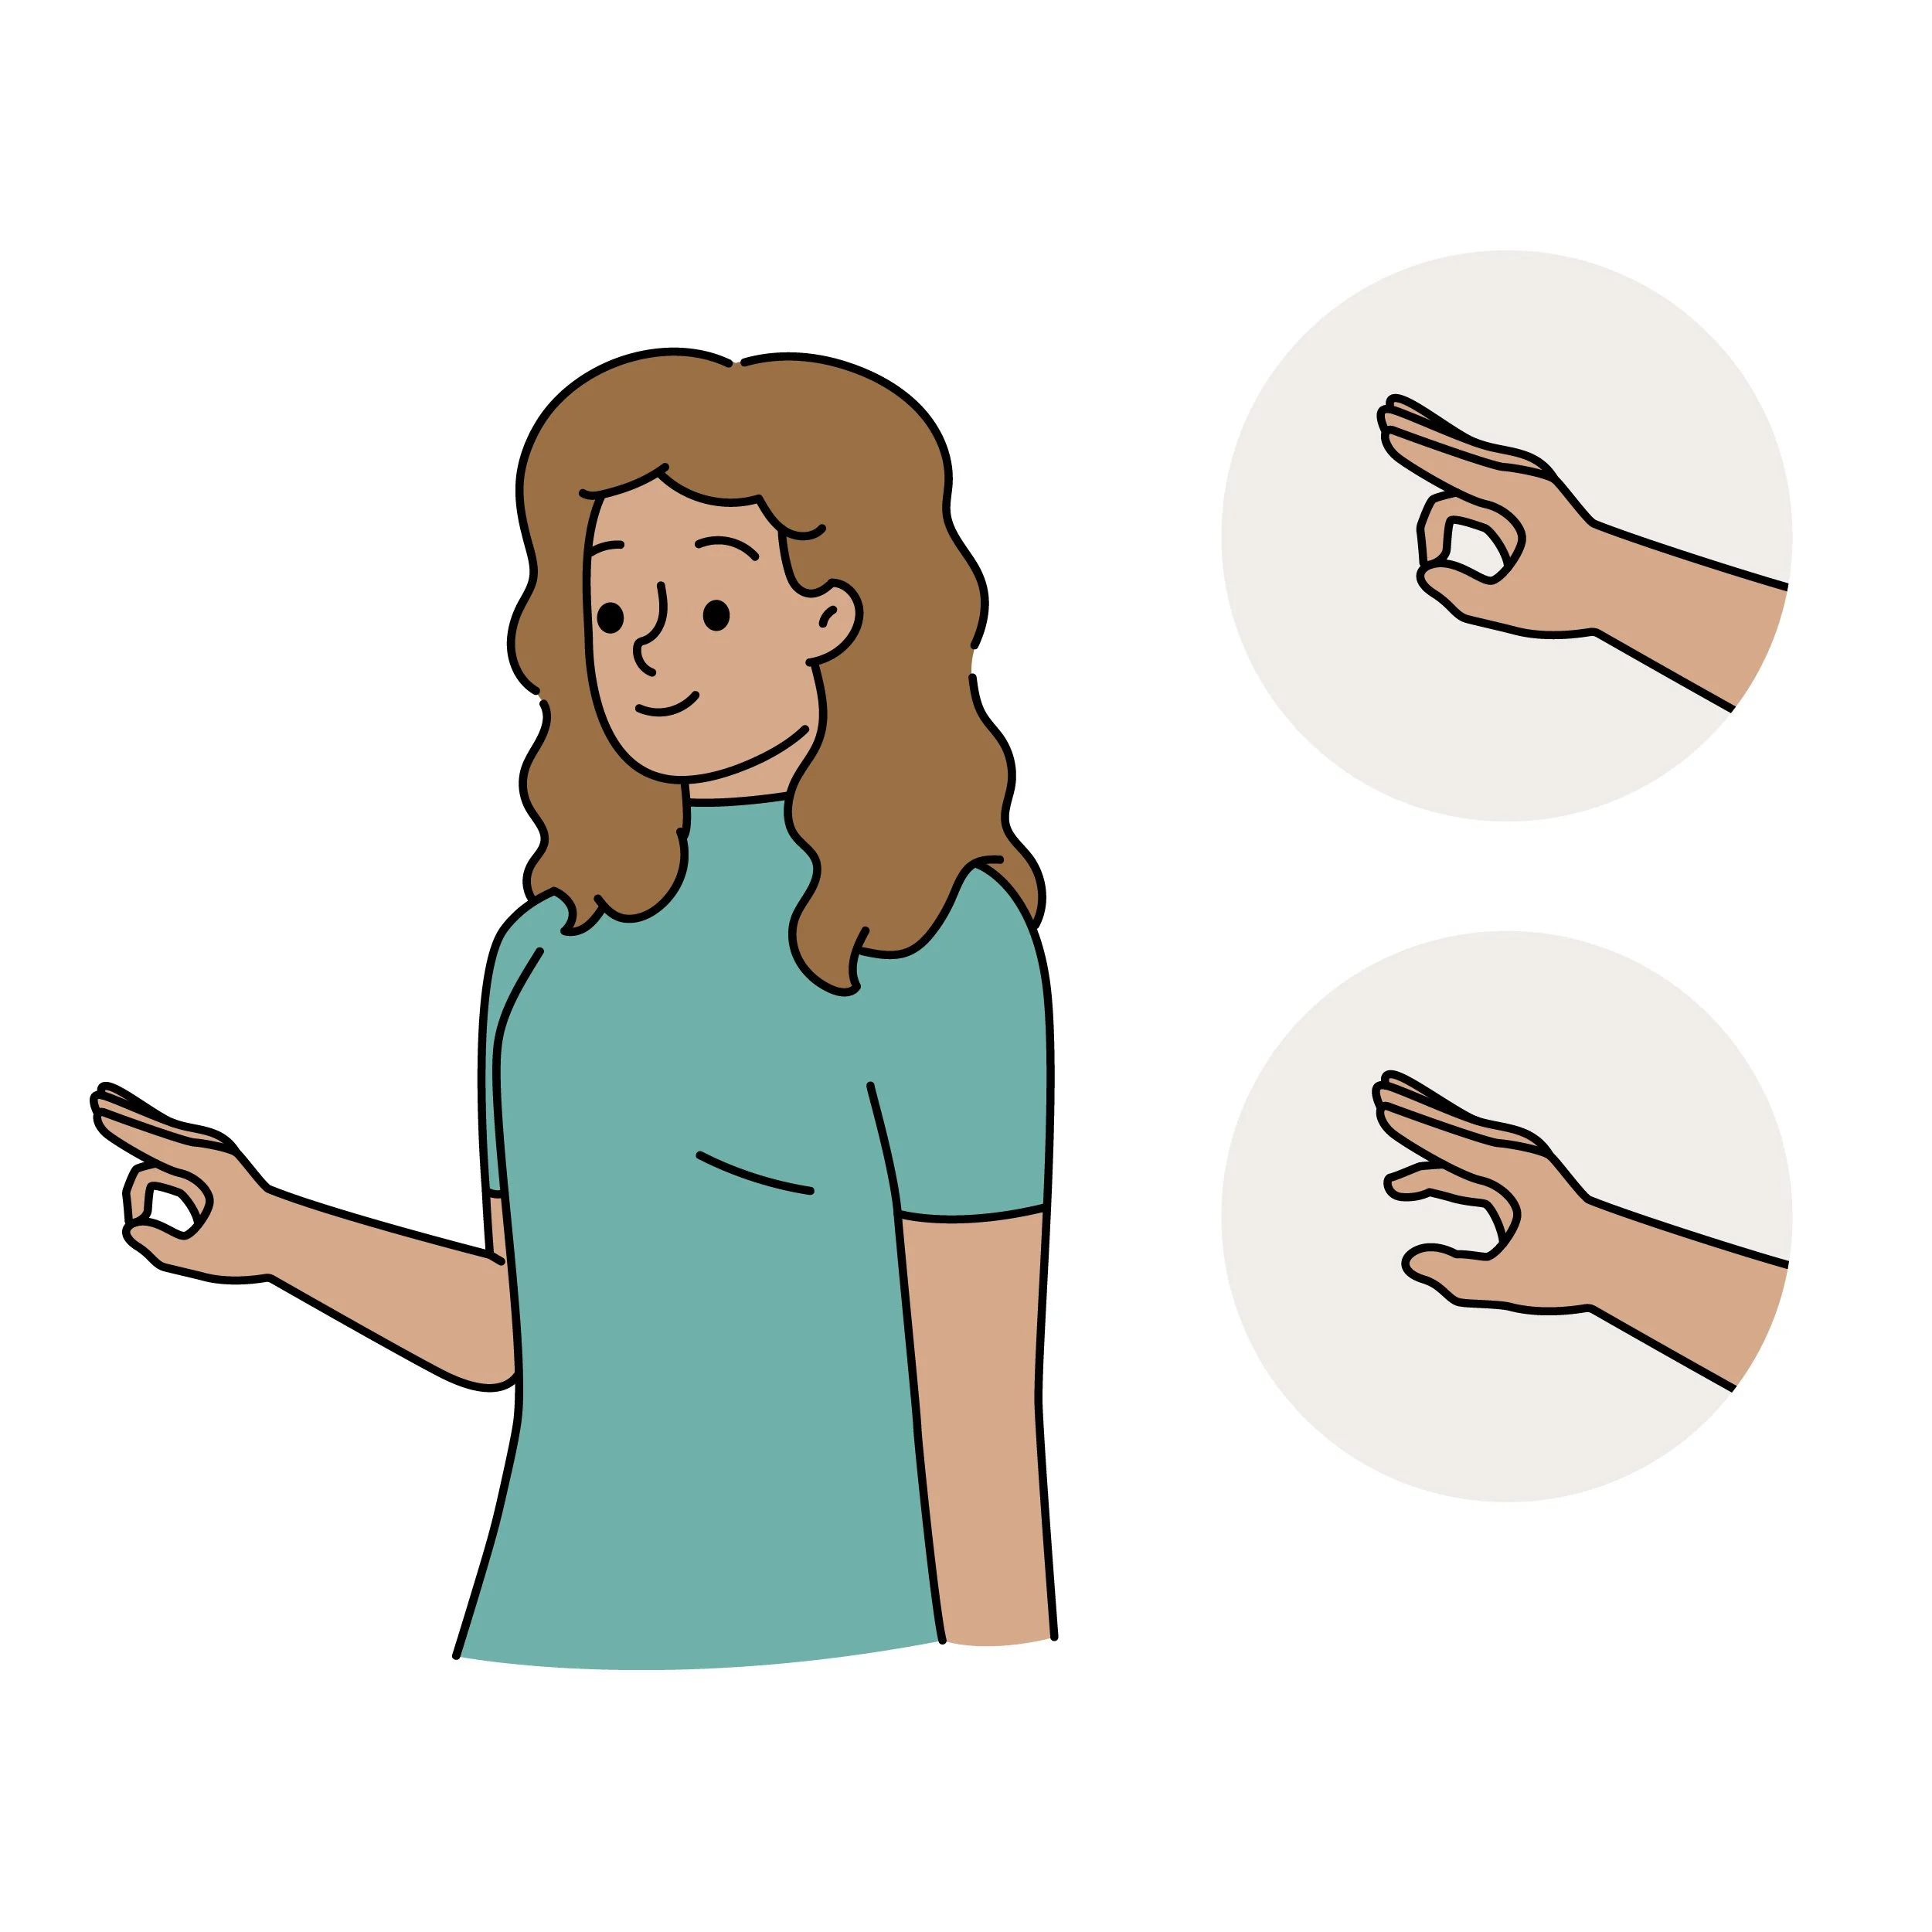
The OK Technique
Form an 'okay' sign with one hand by touching the tip of your thumb to your forefinger. The loop created by these fingers becomes the resistance loop.
Place the thumb and first two fingers of your other hand inside this loop. These become the pressure fingers.
Say 'yes' and press outward gently; the loop should remain intact. Say 'no' and press again; the loop should weaken or break.
Adjust the loop’s tension and outward pressure until it weakens in response to negative or incongruent statements but remains firm on positive or congruent ones. This is the point where the test is most effective.
The Ring Technique
Form a closed ring with the thumb and middle finger on each hand. Link the two rings together like chain links.
One hand can serve as the resistance ring and the other as the pressure ring, which remains firm. For advanced testing, intend for both rings to stay locked for a 'yes' and both to break for a 'no'.
While saying a negative or incongruent statement, gently try to pull the rings apart. The goal is to find a tension level where the rings separate for a negative statement but stay linked for a positive one.
As with the other methods, experiment with the amount of resistance you apply. While making a statement that is negative or incongruent, gently try to pull the rings apart. The goal is to find the level of tension that causes the rings to separate when the statement is incongruent, and to remain linked when it is congruent or positive.
The Finger Pad Technique
Personally, I find this method the most challenging and the least reliable.
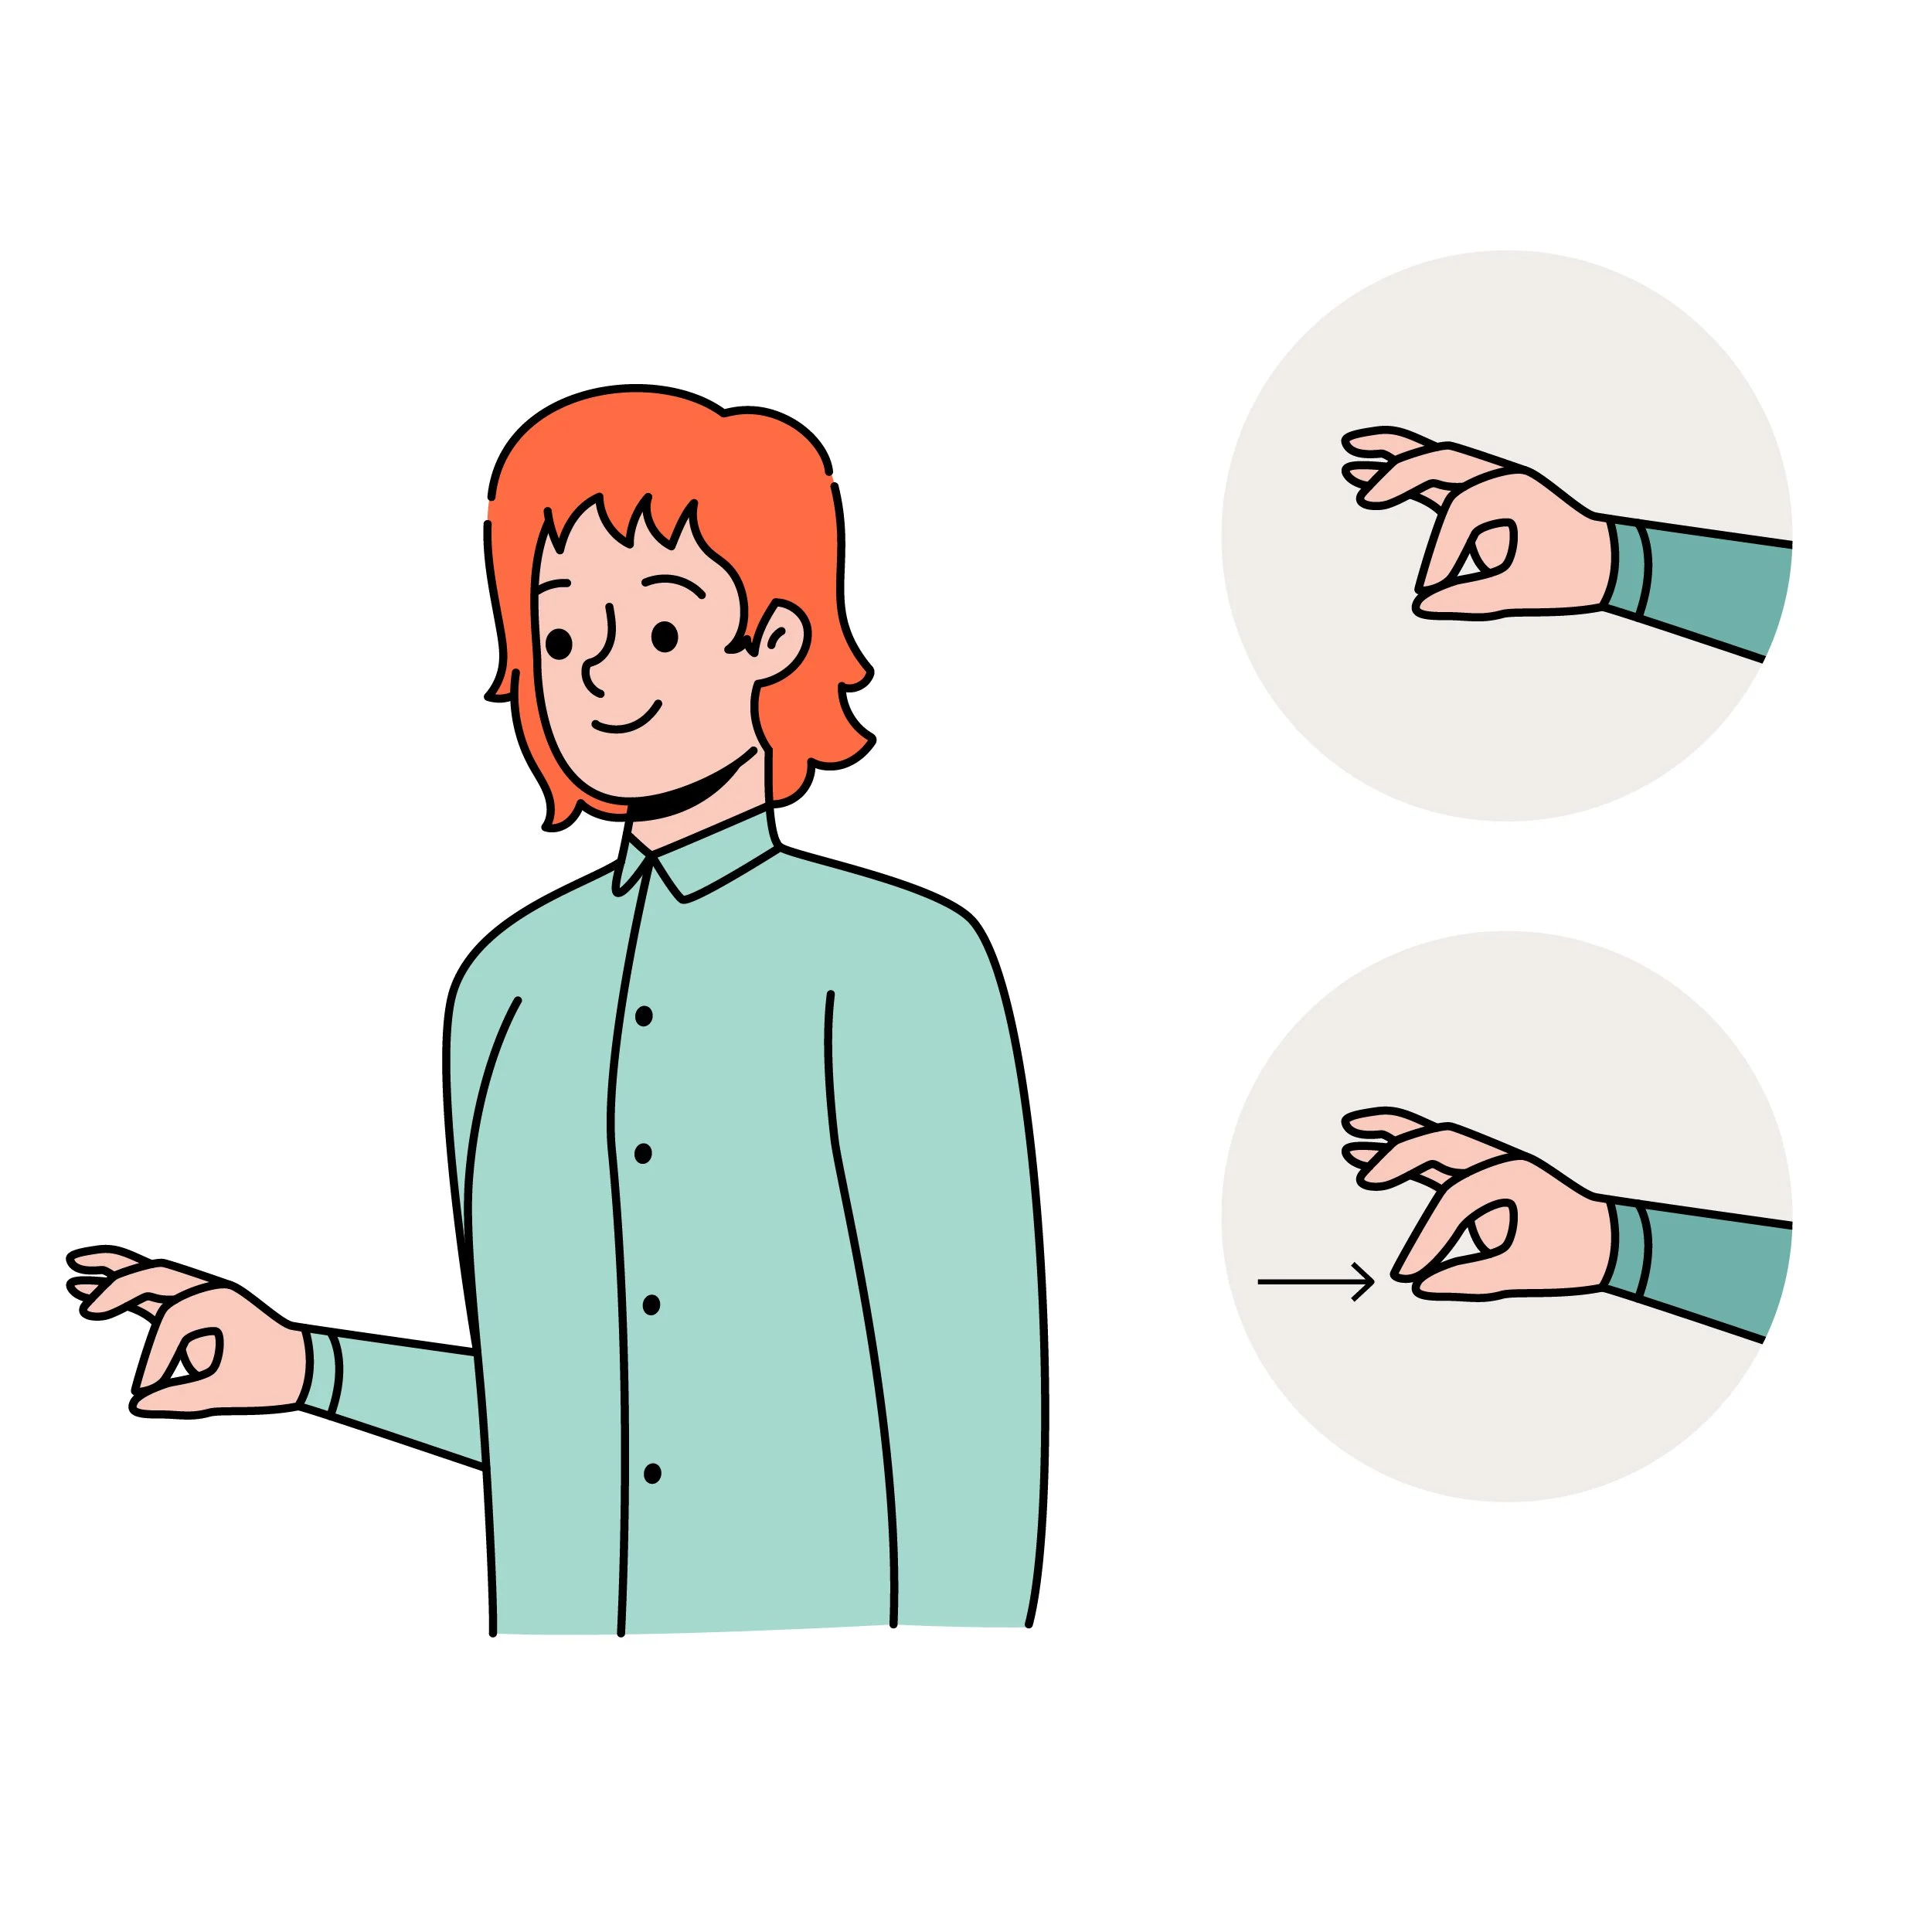
The Finger Pad Technique is a simple method with roots stretching back thousands of years to the healers of ancient China. It detects subtle changes in the body’s energy and electrical field by focusing on the sensations in your fingertips.
Touch the pad of your thumb to the pad of another finger on the same hand. Apply only very light pressure. Then, move the pads in a gentle circular or back-and-forth motion, allowing them to slide smoothly against each other.
While performing this motion, say ‘yes’ and notice any change in the friction between your finger pads. Then say ‘no’ and observe how the sensation changes. Some people feel the pads become slightly 'stickier' with a ‘no’ response, while others notice the opposite.
This method works by detecting subtle, body-wide electrical changes that occur when a person shifts from a congruent (positive) to an incongruent (negative) state. By paying attention to these slight variations, the Finger Pad Technique can reveal responses from the subconscious mind with remarkable sensitivity.
The Pendulum Technique

Pendulums are powerful tools for amplifying subtle responses from the body, especially for those who sometimes question their own muscle testing. Rather than generating information themselves, pendulums serve as a visual indicator of the body’s innate responses, revealing 'yes' and 'no' answers through movement.
Choose a pendulum that feels comfortable in your hand. If you don’t have one, a small weighted object on a chain, such as a pendant, can serve as a temporary substitute. For the best results, however, a proper pendulum is recommended.
The key to using a pendulum effectively is maintaining a clear intention. The pendulum itself does not hold the answers; it simply makes the subtle changes in your body visible.
To begin, sit upright in a comfortable position with your feet flat on the floor. Hold the pendulum between your thumb and forefinger, letting the remainder of the chain rest lightly in your palm. Adjust the length of the chain until the pendulum hangs about 1–3 inches below your hand—just enough to move freely.
Rest your forearm on a stable surface, such as your thigh or a table, but allow your hand to remain free. Small, natural movements are fine—they won’t interfere with the process.
Decide how you want the pendulum to behave at neutral. You have two main options: Keep it as still as possible, allowing only minor natural motion, OR swing it gently in a small arc (about 2 inches) at a 45-degree angle from your left hip toward your right.
The second option often allows the pendulum to settle into a clear answer more quickly, but choose whichever feels most natural.
Next, establish how your pendulum will indicate yes and no: a yes might be a clockwise circle or a gentle forward-and-back swing, similar to nodding, and no could be counterclockwise or side-to-side, like shaking your head.
Test each response several times: hold the pendulum, say 'yes', and notice the movement. Return to neutral and repeat the motion until it becomes consistent. Do the same for 'no', ensuring the motion is clearly distinct from yes.
Once your pendulum’s yes and no are established, use simple true and false statements to verify its responses. Observe how the pendulum moves in response to each statement, adjusting your focus and intention as needed.
With consistent practice, the pendulum will respond reliably, providing a clear, visual representation of the body’s subtle yes/no signals.
This is a very reliable technique for anyone who has difficulty using the other muscle testing methods. The only drawback to this method is that it does take a little longer to discern your answers.
Issues that May Affect Your Ability to Muscle Test
There are a few common issues that may interfere with your ability to conduct muscle testing. These include:
Dehydration: This may make it difficult for a practitioner to get an accurate response from a client. As the tester, I may struggle to read responses accurately if you are not adequately hydrated. It is imperative that we are both well-hydrated before a session.
Misaligned neck vertebrae.
Some trapped emotions: Certain trapped emotions or other difficulties could make you less receptive to positive energy.
Lack of confidence: You may struggle most if you cannot properly trust your results. Successful muscle testing requires a certain amount of faith and trust in the Divine and in yourself.